Last updated August 22, 2026 · Editorial policy
Great travel photos turn ordinary trips into memories you’ll revisit for decades. Bad photos sit forgotten on a hard drive. The difference isn’t your camera — it’s a few simple techniques anyone can learn. Here are 20 actually useful travel photography tips from 15 years and 50+ countries.
Equipment: What You Actually Need
1. Modern Phone Is Enough for 90% of People
iPhone 14 Pro, Pixel 7+, Samsung Galaxy S23+ all produce gallery-quality photos. Don’t buy a camera unless you genuinely care about photography as a hobby.
2. If Buying a Camera: Mirrorless Beats DSLR
Smaller, lighter, often better. Top travel cameras (2026): Sony A7C II, Fuji X100V, Canon R6 II, Sony ZV-E10. Budget: Sony A6000 ($600 used).
3. One Versatile Lens Beats Three Specialized Lenses
A 24-70mm or 24-105mm zoom covers 80% of travel shooting. Adding a 70-200mm telephoto only if you shoot wildlife/sports. Skip the prime lens collection.
4. Phone Tripod (Optional But Useful)
$20 phone tripod (Joby GorillaPod) enables: long exposure shots, family group photos, low-light shots, video. Worth the carry weight.
Composition: The Single Biggest Lever
5. Rule of Thirds
Don’t center your subject. Place them on a “third line” (left/right third for portraits, top/bottom third for landscapes). Phone cameras have a grid overlay — turn it on in Settings.

6. Leading Lines
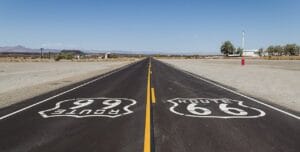
Roads, paths, walls, rivers — anything that leads the eye toward your subject. Especially effective: cobblestone streets in European cities, beach shorelines, mountain ridges.
7. Foreground Interest
Add depth by including foreground elements: rocks, flowers, doorways, hands holding objects. Makes the photo three-dimensional vs flat.
8. Frame Within a Frame
Shoot through windows, archways, tree branches, alleyways. Creates depth + draws viewer into the scene.
9. Symmetry + Reflections
Water reflections (lakes, puddles, polished marble), perfectly aligned architecture, mirror images. Center the subject when shooting symmetry.
10. Negative Space
Don’t fill every inch. Empty sky, blank walls, expansive water all make the subject stand out more. Especially good for minimalist photos.
Lighting: The Difference Between Amateur + Pro
11. Golden Hour (1 Hour After Sunrise, 1 Hour Before Sunset)
Soft, warm, golden light. Every photo looks better. Plan major shoots during golden hour. Use sun-tracking apps (PhotoPills, Sun Surveyor) to predict timing.
12. Blue Hour (20 Minutes After Sunset)
Deep blue sky + city lights starting to glow. Best urban photography time. Tripod helps.
13. Avoid Midday Sun (10am-2pm)
Harsh shadows, washed-out colors. If you must shoot midday: shoot in shade, find covered alleys, use overhangs.
14. Overcast = Free Soft Light
Cloudy days give even, flattering light. Perfect for portraits, food, intimate shots. Don’t avoid grey days — embrace them.
15. Backlight for Drama
Place sun BEHIND your subject. Creates silhouettes (city skylines, mountains) or halos (people, animals).
Phone Photography Specific
16. Use Pro/Manual Mode
iPhone: shoot in RAW + adjust manually. Pixel: night mode automatic. Galaxy: Pro mode lets you control ISO + shutter speed.
17. Shoot in RAW (When Available)
Preserves more data for editing. Standard JPEG loses 70-80% of color/light information. iPhone Pro models + Galaxy Ultra support RAW.
18. Don’t Use Digital Zoom
Digital zoom = cropping a smaller portion of sensor. Crop later in editing for same result with full quality. Use optical zoom (telephoto lens) for actual zoom.
19. Clean Your Lens
Fingerprints + oils on lens kill image quality. Clean before every shoot. Microfiber cloth on you always.
Editing: 80% of Pro Photos Are Edited
20. Use Lightroom Mobile (Free)
Best mobile photo editor. Free version is sufficient for 90% of users. Basic adjustments: exposure, contrast, highlights/shadows, vibrance, sharpening.
Photographing People (Respect + Etiquette)
Ask permission before photographing strangers, especially in non-Western cultures. Most people say yes. Offer to email them the photo (build rapport).

Use longer focal lengths (50-85mm equivalent) for candid portraits — less intrusive than wide-angle close-ups.
Religious sites often prohibit photography. Check signs first.
Don’t tip for photos in some cultures (Vietnam, Cambodia) — it teaches kids to beg. Buy a meal instead.
Specific Locations
- Cities: Blue hour from rooftops. Wide-angle for streetscapes. Shoot architecture at golden hour.
- Beaches: Golden hour. Low angle (kneel/lie down). Include foreground (rocks, footprints).
- Mountains: Foreground rocks/flowers + mountain in distance. Leading paths.
- Markets: Capture products AND people. Get close (35-50mm equivalent).
- Animals: Eye contact + longer focal length (200mm+). Patience required.
- Northern Lights: Tripod mandatory. Wide aperture (f/2.8). 10-15 second exposures. ISO 3200+.
Backup Your Photos Daily
Don’t lose your trip. Backup every day:
- Phone: auto-backup to Google Photos (free 15GB) or iCloud (paid).
- Camera: copy SD card to laptop OR portable SSD daily.
- Cloud backup: Dropbox, OneDrive, or Backblaze ($7/month unlimited).
- Best practice: Have photos in 3 places (camera memory card + phone + cloud).
FAQ
What camera should I bring for travel?
For most people: your modern smartphone (iPhone 14 Pro+, Pixel 7+, Galaxy S23+ produce gallery-quality photos). Only buy a dedicated camera if you enjoy photography as a hobby. Best travel cameras: Sony A7C II, Fuji X100V, Sony A6000 (budget).
What’s the best time of day to take travel photos?
Golden hour: 1 hour after sunrise + 1 hour before sunset. Soft, warm light makes every photo look better. Blue hour (20 min after sunset) is best for urban + city skyline shots. Avoid 10am-2pm midday harsh sunlight.
Should I shoot in RAW?
Yes if you plan to edit. RAW preserves 5-10x more data than JPEG for editing flexibility. Phone RAW available on iPhone Pro + Galaxy Ultra. Standard JPEG fine if you don’t edit.
What’s the best photo editing app for travel?
Lightroom Mobile (free). Best mobile editor with desktop integration. Free version sufficient for 90% of users. Alternatives: Snapseed (free, simpler), VSCO (filters), Photoshop Express (free).
How do I photograph people without being rude?
Ask permission before photographing strangers (especially non-Western cultures). Use longer focal lengths (50-85mm) for less intrusive shots. Offer to email them the photo. Avoid photographing children without parent consent.
Should I bring a tripod for travel?
Phone tripod ($20 Joby GorillaPod) is worth carrying. Enables long exposures, group photos, low-light shots. Full-size tripod only if serious about photography – too bulky for most travelers.
How do I back up travel photos?
Daily backup. Phone: auto-sync to Google Photos or iCloud. Camera: copy SD card to laptop or portable SSD. Cloud backup (Dropbox, Backblaze). Goal: photos in 3 places at all times – camera + phone + cloud.
Related Travel Guides
- Ultimate Packing List
- Best Travel Apps 2026
- How to Beat Jet Lag
- International Travel Safety
Gear that earns its place: best travel cameras for beginners.
You Might Also Love


Written by
John Morrison is the founder and lead travel writer at Packzup. Over the past decade he has explored destinations across Africa, the Americas, Asia, Europe, the Middle East, and Oceania — always self-funded, never on a press trip.